PrusaSlicer lets you define different regions of your model to be printed with a different layer height and automatically smooth the transition between them. This can result in significantly shorter print times with minimal sacrifice to the print quality.
 The variable layer height can be set up either automatically, manually or you can combine the two workflows together.
Setting up variable layer height
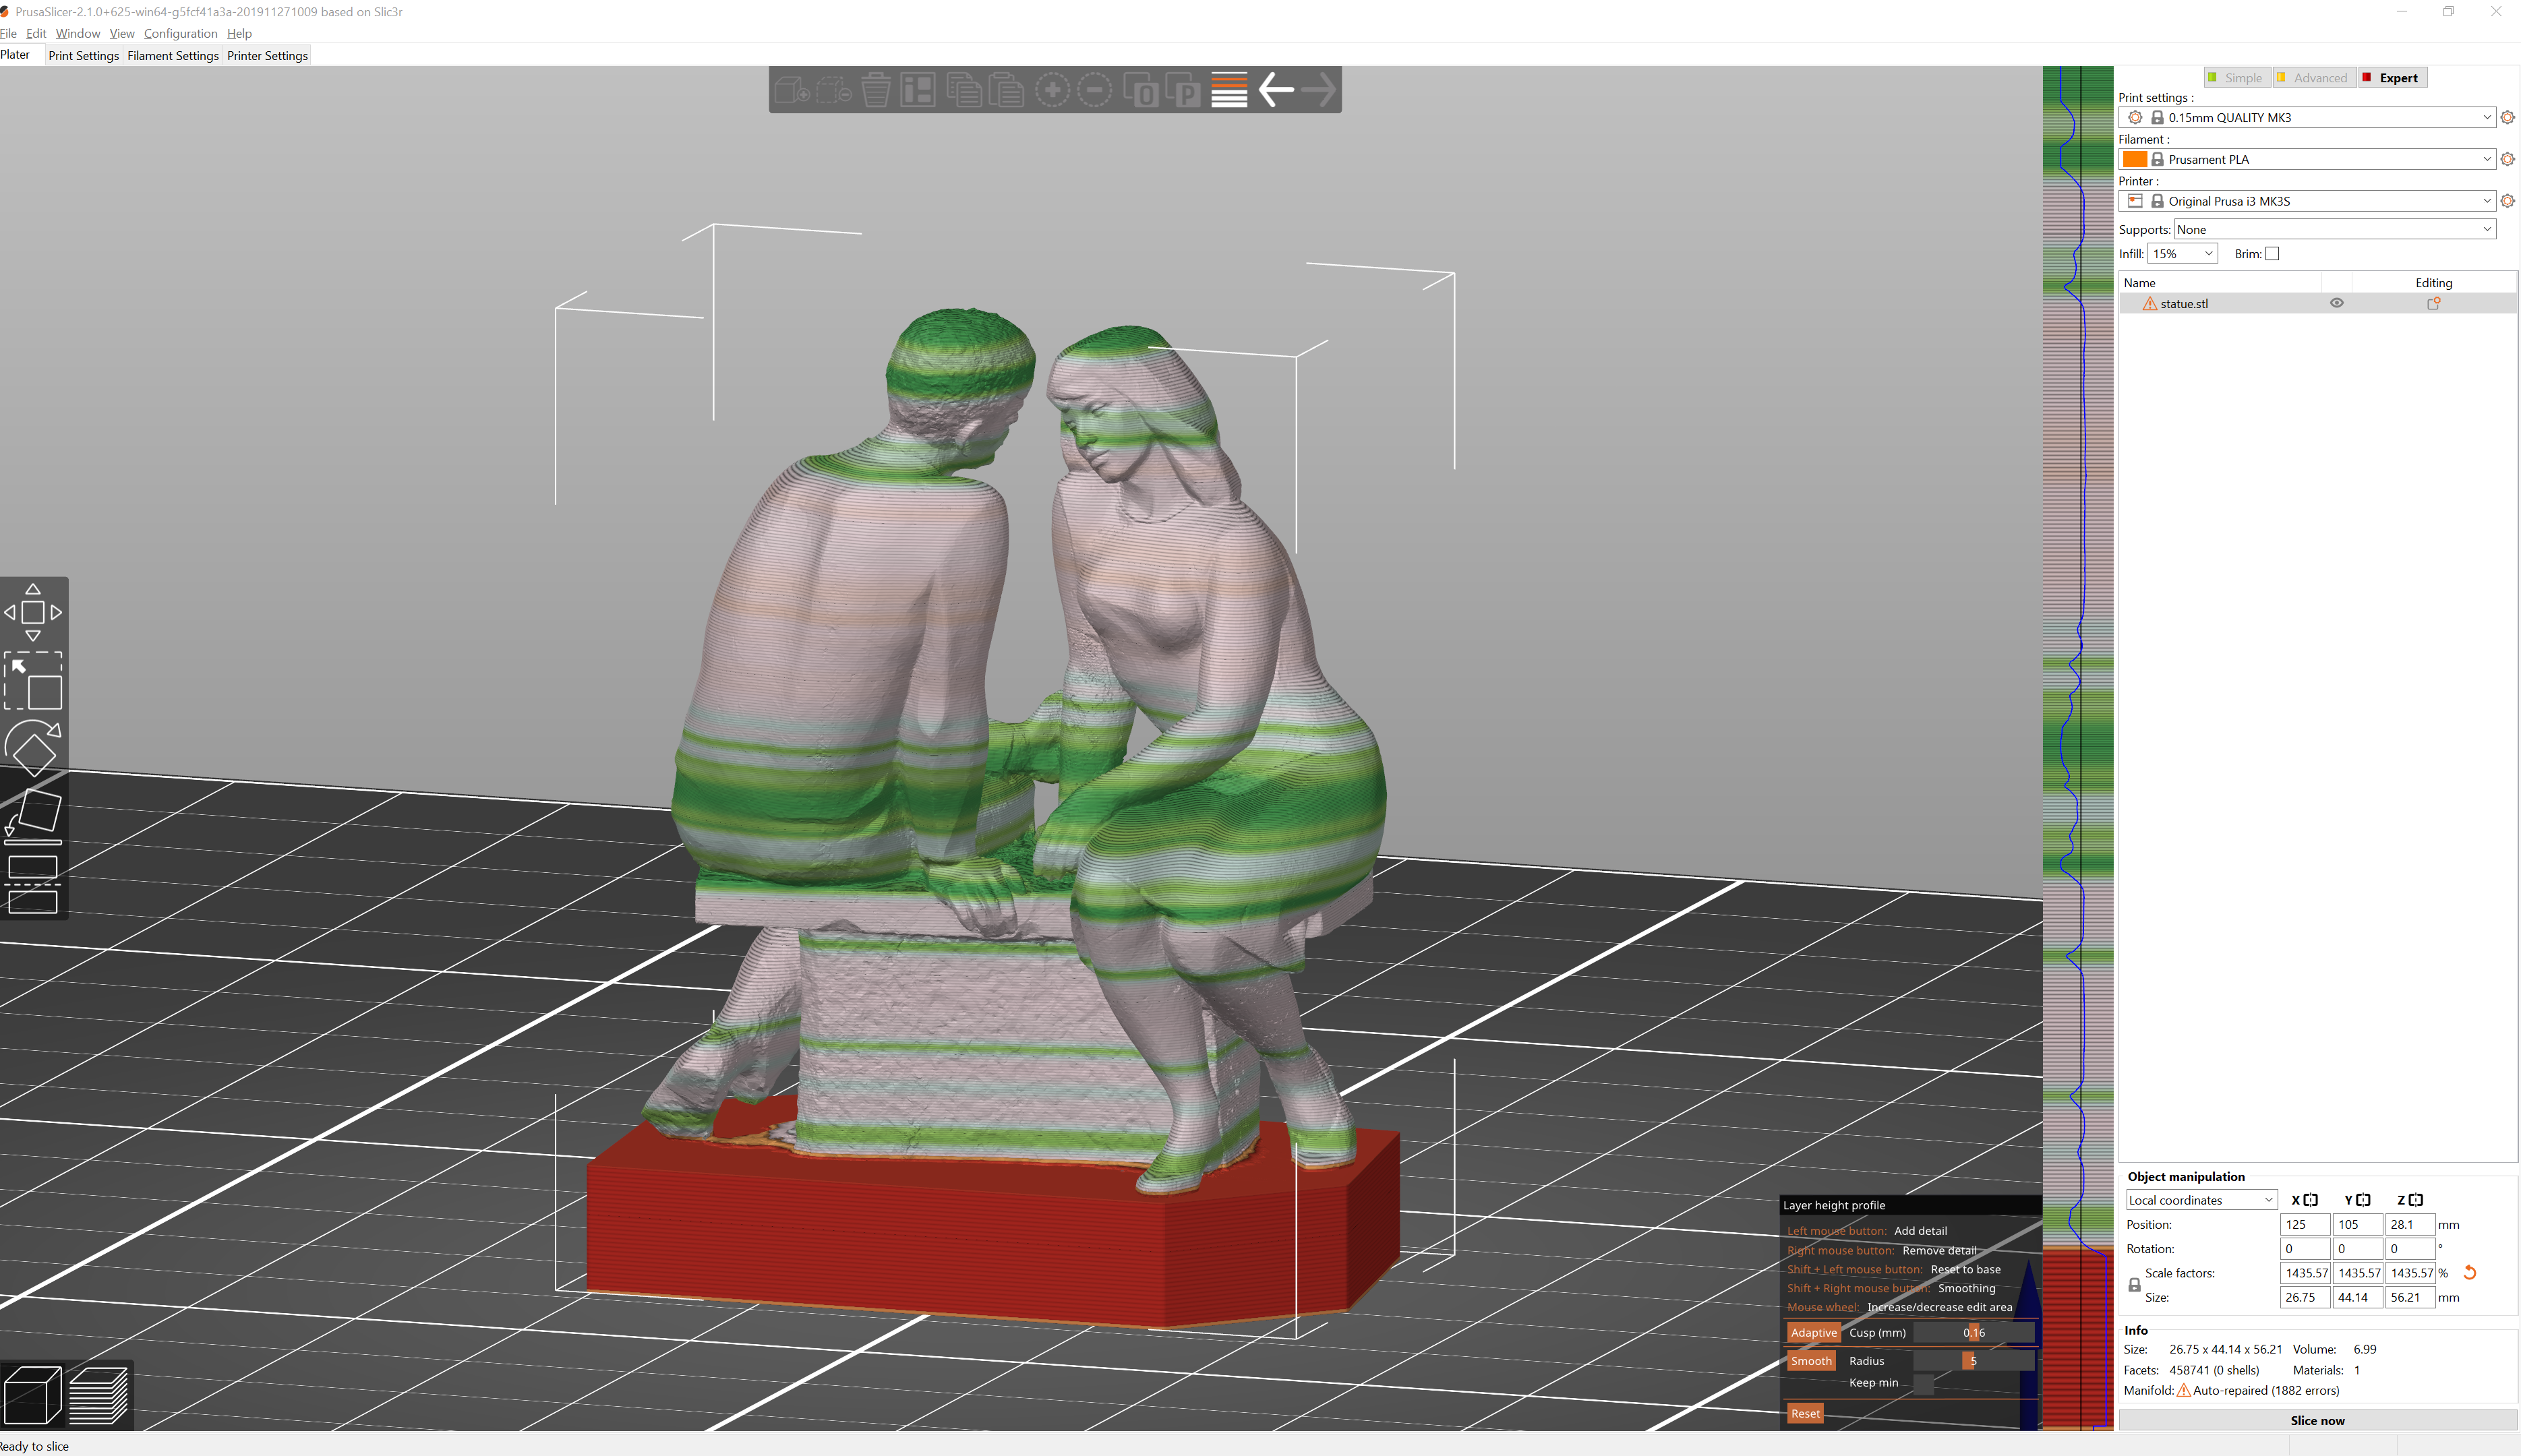
First, select a model in the 3D view. Then the variable layer height tool becomes available in the top toolbar. As soon as you activate it a realtime preview of the contour lines created by individual layers is displayed. A new window appears in the bottom right corner and a new panel is displayed on the right side of the 3D view.
|
Adaptive Calculates the layer profile according to the Quality/Speed setting. Quality/Speed By moving this slider you can change the ratio of small and tall layers. Hit the Adaptive button to see the new variable layer profile. Smooth As the name suggests, this smoothes the layer variable layer height profile. A bigger radius will smooth the curve more. You can press this button repeatedly to get an even smoother result. Keep min When enabled the smallest layer heights(green) won't be smoothed and will remain at their minimum value. Reset Resets the variable layer height settings (both automatic and manual changes). | 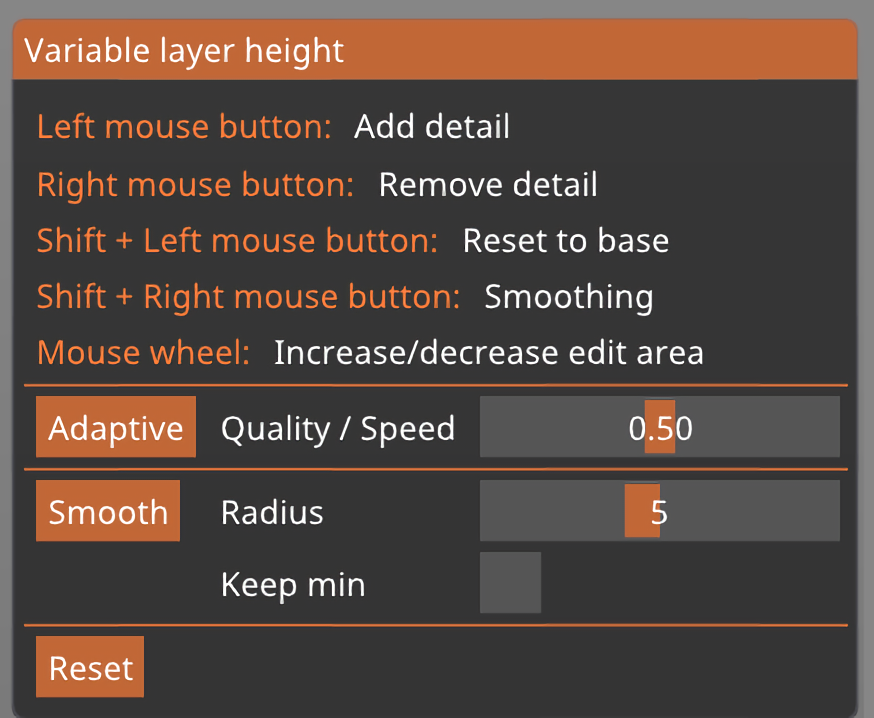 |
You can manually edit the result of the automatic variable layer height.
You can also skip the automatic step completely and set everything manually.
When you hover the mouse above the variable layer height panel (on the right), the affected part of the model is highlighted in yellow.
Left mouse button Add detail
Right mouse button Remove detail
Shift + Left mouse button Reset to base
Shift + Right mouse button Smoothing
Mouse wheel Increase od decrease the edited area
Note that all instances of the object are also affected by the variable layer height tool.
You may notice a sharp jump on the bottom of the blue line - that’s normal and it’s a visual representation of the first layer height setting.
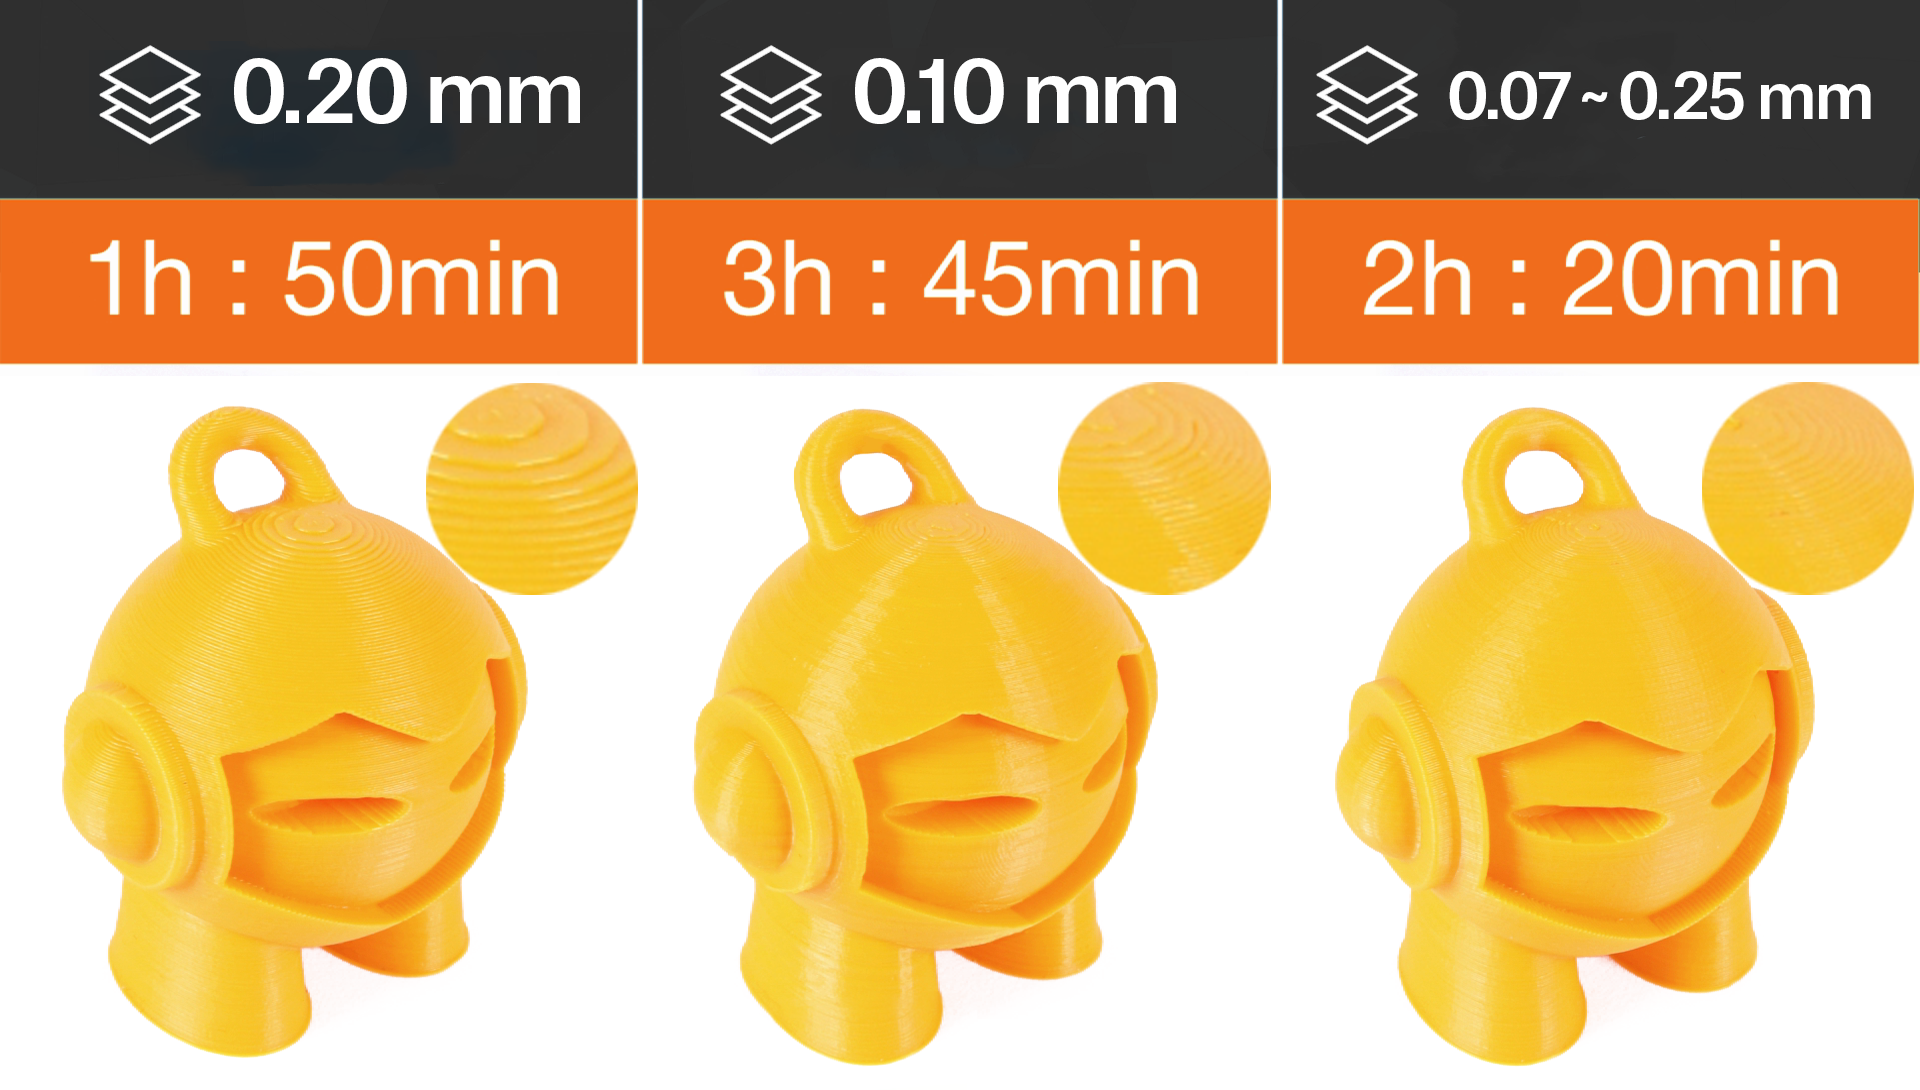
A practical example of variable layer height
What layer height profile should you pick?
Try to select a profile with a layer height that's close to what the majority of the print will be printed at. You could say that it doesn't really matter, if you move the slider to favor more quality/speed you can get really small layer heights even if you have a really tall layer profile selected. However, the profiles also change other things except for just the layer height - tall layers get wider extrusion, for example. A good "average" layer height profile (e.g. 0.15 mm layer height profile for 0.4 mm nozzle) will most likely also work well for most cases.
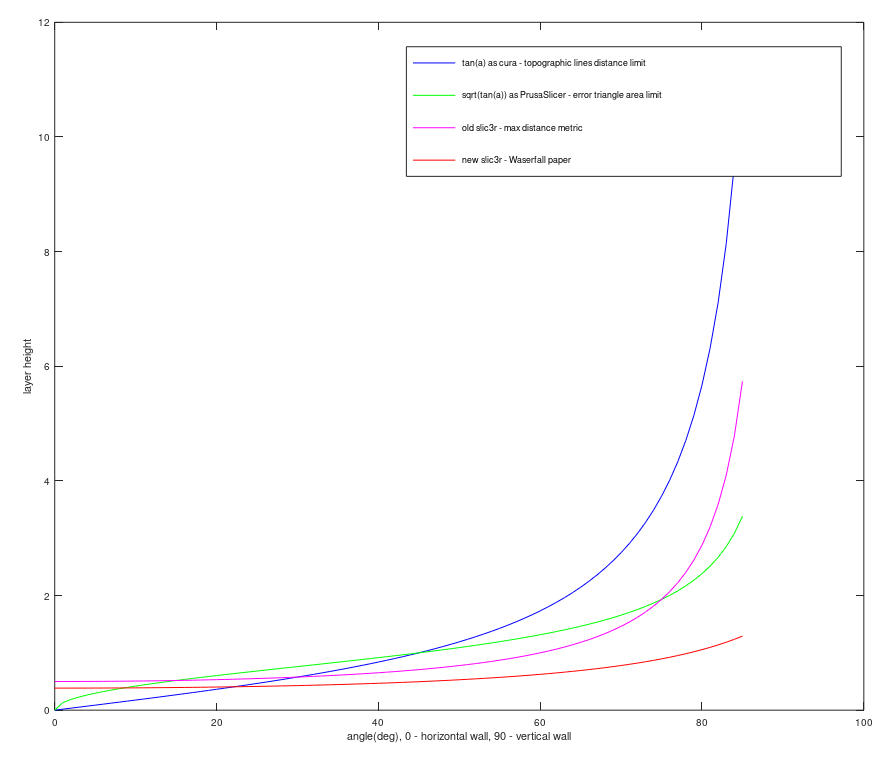
Automatic variable layer height metrics
We have experimented with various metrics for surface quality. The metrics by Florens Wasserfall et al. implemented in Slic3r limits the maximum discretization error (largest Euclidean distance of the stepped surface from the source model).
Cura limits the maximum distance of contour lines in the XY plane, producing more intuitive results than the metric by Waserfall.
In the end, we have implemented yet another metric, limiting the cross-section area between the stepped surface and the source model. The following graph shows the layer height limit of various metrics depending on the surface slope.
24 comments
It would be great if one could set the layer height and curing time per layer individually for each layer ...
Please just let us insert points where the layer height is changed, and let us type in the new layer height at that point.
This refers to the preview shown on the model itself, you will see different colours when you make a change to the layer height on the right-side panel.